Creating a Live Dashboard Example with GitHub Actions#
Detailed instructions for deployed to GitHub pages can be found here: https://docs.github.com/en/pages/getting-started-with-github-pages/creating-a-github-pages-site
In this tutorial, I will be walking you through an example of a live dashboard that uses GitHub actions to update itself regularly with fresh data. Once the data and corresponding charts are refreshed, the updated charts are pushed to GitHub pages. This is all done automatically by GitHub Actions.
Steps, Simplified#
Fork the repository available here: jmbejara/example-updating-dashboard. You can see the final product here: https://jeremybejarano.com/example-updating-dashboard
Make sure that a
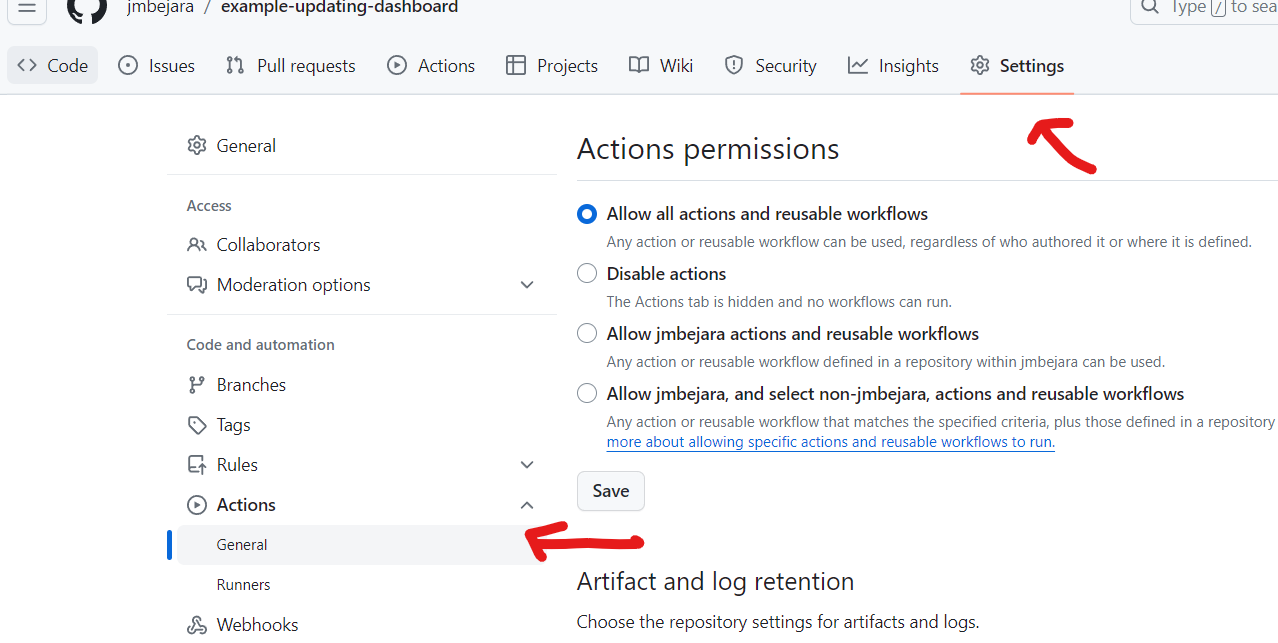
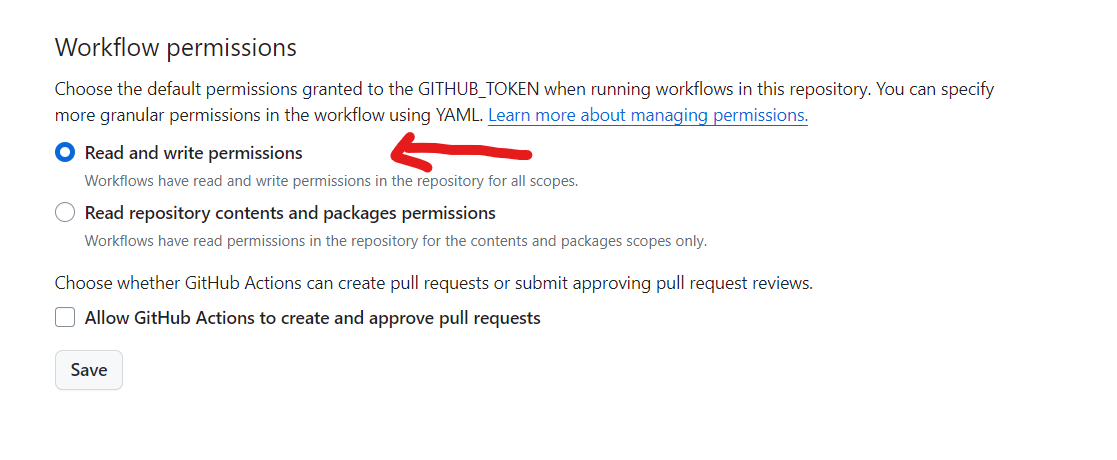
.nojekyllfile is added to the root of the folder that you will be serving HTML from. This is done for you in the repo above, but I wanted to remind you of it because it’s a common pitfall. (Done for you.)Give GitHub Actions permission to commit to your repo. You can find this setting in the “Settings” tab, and then in the Actions subtab.
Set up the GitHub Pages settings so that it serves from the
docsfolder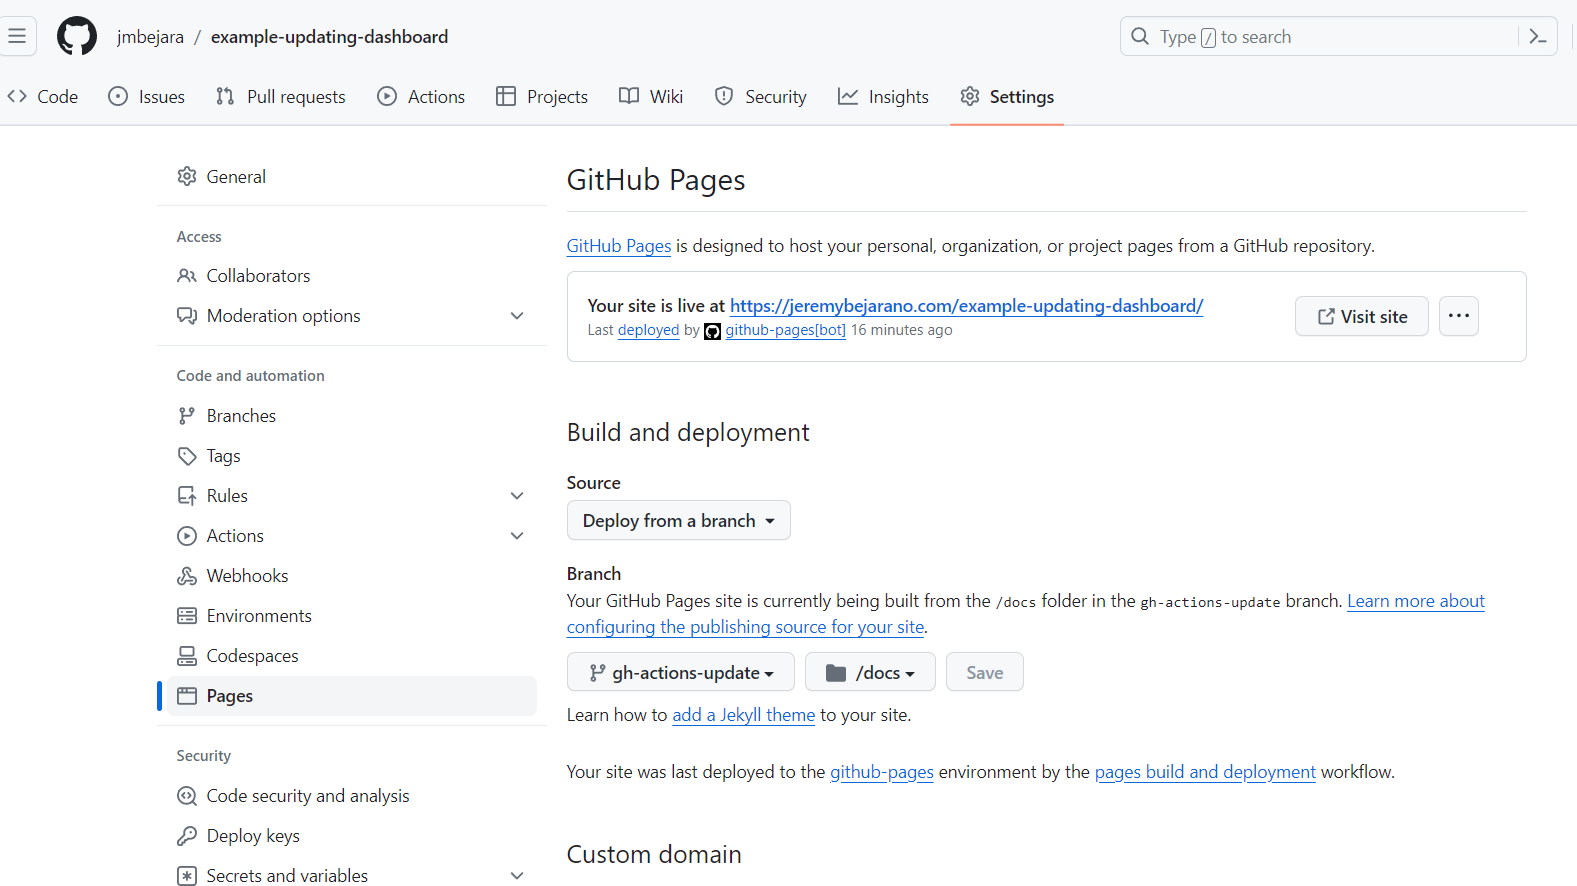
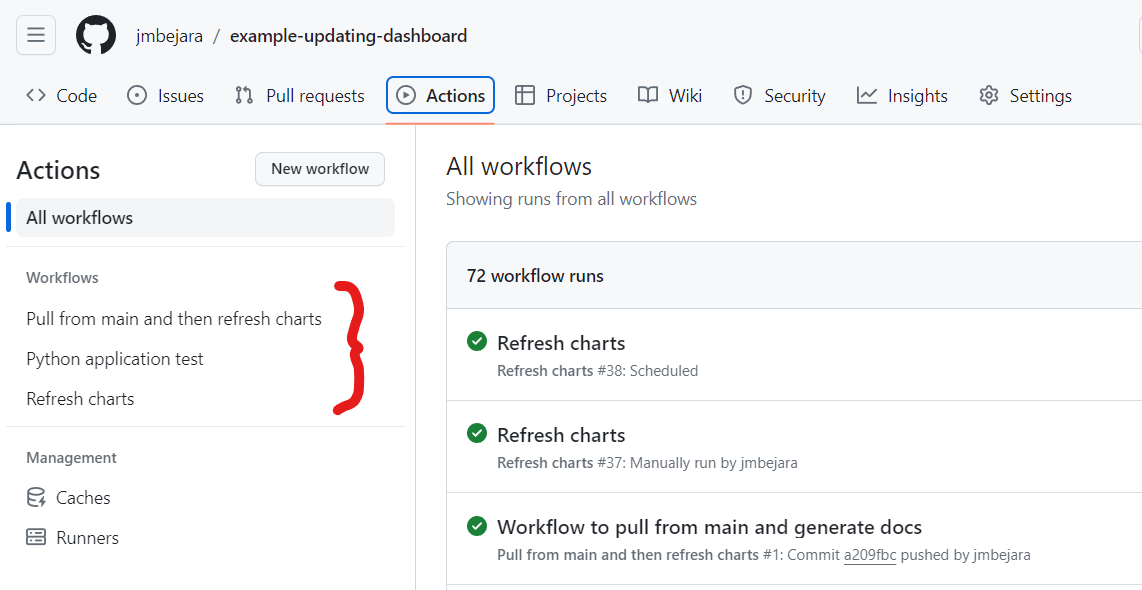
Actions, Explained#
In this example repo, I use 3 different actions: one for testing, one for pulling changes from the main branch to the deployment branch, and one for regular updates to the deployment branch.