Virtual Environments#
When developing software, particularly in data science and quantitative finance, managing dependencies and ensuring consistent environments across different systems are crucial.
A common tool that you will encounter are Conda environments, often using environment.yml files, or sometimes paired with pip and its requirements.txt files.
This short note will explain the importance of these tools and files in creating reproducible and reliable software environments.
Examples: Streamlit Finance Dashboards#
These two examples demonstrate examples of end products that might inspire you. These are very simple examples that are easy to construct, but they are here to give you ideas for what you might want to build.
Reproducing these example is made easy with the use of software environments.
Example 1: Streamlit Finance Dashboard#
This app is a simple example of using Streamlit to create a financial data web app. This demo use streamlit, pandas and yfinance modules.
Allows you to select one of the 500 companies that compose the S&P 500 and display a updated chart of adjusted closing prices, as well as add a pair of moving averages.

Clone the repository located here: jmbejara/streamlit_finance_chart
Navigate the command line to the source directory. Or, open the cloned repo in VS Code and then open the VS Code terminal.
In the terminal, use the following commands to create and install the associated environment.
conda create -n streamlit python=3.12
conda activate streamlit
pip install -r requirements.txt
You can then run the dashboard with
streamlit run app.py
After this, you can remove the conda environment if you like: conda remove --name streamlit --all
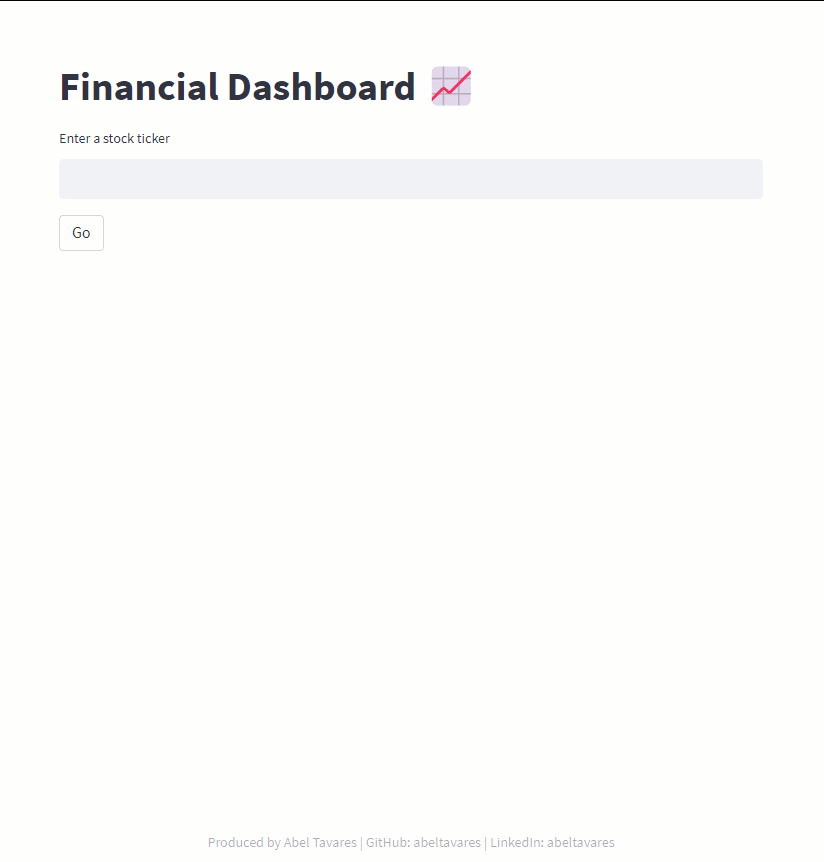
Example 2: Another Streamlit Dashboard, except that it requires API keys for data service#
FinStockDash is a web application that allows users to analyze stock data using various financial ratios, balance sheet, income statement, and other financial metrics. User can enter a stock ticker symbol to retrieve relevant financial information, view stock prices over time, and generate visualizations to gather insights on the company performance. The application makes use of APIs provided by Financial Modeling Prep and Alpha Vantage to retrieve real-time stock data.
This example requires API keys for data service. API keys are an example of a secret.
Secrets are a type of information that should not be shared with others. In this example, the
secrets are stored in a file called .env. We’ll learn more about this in today’s lecture.
Clone the repository located here: jmbejara/FinStockDash
Navigate the command line to the source directory. Or, open the cloned repo in VS Code and then open the VS Code terminal.
In the terminal, use the following commands to create and install the associated environment.
To run the app locally, follow these steps:
Clone the repository:
$ git clone https://github.com/abeltavares/financial_dashboard_app.git
Create and activate a virtual environment:
$ python3 -m venv .venv
$ source .venv/bin/activate
Install the required libraries:
$ pip install -r requirements.txt
Create a
.envfile with the proper API keys. Use the.env.examplefile as a template.Run the app:
$ streamlit run app.py
You can deactivate the environment with
deactivate
You can delete the virtual environment with
rm -rf .venv
or on Windows command prompt:
rmdir .venv
(or rmdir /S /Q .venv to remove the directory and all its contents)
Understanding Dependency Management#
Dependencies are external libraries or packages that your project needs to function correctly. In data science, examples include NumPy for numerical operations, pandas for data manipulation, and Matplotlib for plotting.
Why Manage Dependencies?
Consistency: Ensures that all developers and users work with the same versions of libraries, avoiding the “it works on my machine” problem.
Isolation: Protects system-level Python and prevents conflicts between project dependencies.
pip and requirements.txt#
pip is the standard package manager for Python, allowing for the installation of packages from the Python Package Index (PyPI). A requirements.txt file is
a text file listing the dependencies needed for a project.
Each line in
requirements.txtrepresents a package and its version.Use
pip install -r requirements.txtto install all dependencies at once.
For example, these are the contents of the requirements.txt file used to generate this textbook:
altair==5.1.2
beautifulsoup4==4.12.2
doit==0.36.0
ipython==8.17.2
jupyter==1.0.0
jupyterlab==4.0.8
jupyter-book==0.15.1
linearmodels==5.3
matplotlib==3.8.1
notebook==7.0.6
numpy==1.26.0
openpyxl==3.1.2
pandas==2.1.2
pandas-datareader==0.10.0
pandas-market-calendars==4.3.1
plotly==5.18.0
plotnine==0.12.4
polars==0.19.12
python-decouple==3.8
python-dotenv==1.0.0
pytest==7.4.3
pyxlsb==1.0.10
requests==2.31.0
scikit-learn==1.3.2
scipy==1.11.3
seaborn==0.13.0
statsmodels==0.14.0
streamlit==1.28.1
vega_datasets==0.9.0
wrds==3.1.6
xbbg==0.7.7
xlrd==2.0.1
zstandard==0.22.0
This allows us to install all of the needed packages at once. However, this does not provide isolation from other projects. This is where a virtual environment becomes useful.
What is a virtual environment?#
A virtual environment is an isolated workspace that allows you to manage separate sets of dependencies and Python versions for different projects, preventing conflicts and maintaining a clean and manageable development setup. Some examples of software within the Python ecosystem that provide such environments are venv, virtualenv, or conda environments. Here, I’ll focus on conda environments.
conda Environments#
conda is a package manager that handles Python packages and also binaries for other languages. It is particularly useful in data science due to its ability to manage complex dependencies and environments. A major advantage of conda, at least in the past, was its ability to handle dependencies on non-Python packages. conda as a package manager can install non-Python dependencies.
Conda’s environment.yml files
Besides functioning as a package manager to handle dependencies, it also provides virtual environments. An advantage of conda environments is that they can easily manage different versions of Python as well as Python packages. This must be done in a more manual fashion with something like venv.
The description of the software environment is defined by the environment.yml file. It is
a YAML file that specifies not just Python packages but also the Python version and other binaries.
conda env create -f environment.ymlcreates an isolated environment with specified dependencies.conda activate <env_name>to activate the environment.
The following is an example of an environment.yml file:
name: finm
channels:
  - conda-forge
  - defaults
dependencies:
  - python>=3.10.12
  - pandas>=2.1.2
  - altair>=5.1.2
  - beautifulsoup4>=4.12.2
  - doit>=0.36.0
  - ipython>=8.17.2
  - jupyter>=1.0.0
  - jupyterlab>=4.0.8
  - jupyter-book>=0.15.1
  - linearmodels>=5.3
  - matplotlib>=3.8.1
  - notebook>=7.0.6
  - numpy>=1.26.0
  - openpyxl>=3.1.2
  - pandas-datareader>=0.10.0
  - pandas-market-calendars>=4.3.1
  - plotly>=5.18.0
  - plotnine>=0.12.4
  - polars>=0.19.12
  - python-decouple>=3.8
  - python-dotenv>=1.0.0
  - pyxlsb>=1.0.10
  - pytest>=7.4.3
  - requests>=2.31.0
  - scikit-learn>=1.3.2
  - scipy>=1.11.3
  - seaborn>=0.13.0
  - statsmodels>=0.14.0
  - streamlit>=1.28.1
  - vega_datasets>=0.9.0
  - xbbg>=0.7.7
  - xlrd>=2.0.1
  - zstandard>=0.22.0
Benefits of conda Environments
Cross-Language: Manages dependencies for languages other than Python.
System Independence: Works across different operating systems.
Environment Cloning: Allows for easy replication of environments.
Performance Issues with Conda#
As of the last few years, conda has been dealing with some persistent performance issues,
such as slow package installation, dependency resolution taking a long time, and a sluggish environment creation or update process.
This is primarily due to its comprehensive package management system that handles both Python and non-Python packages.
The Anaconda team has been working on this. However, in my opinion, there are some usability issues that still need to be resolved.
For more information, see here:
One solution involves mamba. See here: mamba-org/mamba
mamba mamba is a reimplementation of the conda package manager in C++, designed to be much faster and more responsive.
I recommend installing the miniforge distribution. See here: conda-forge/miniforge
My recommendation#
In my experience, it has been easier to work with a combination of conda and pip. I have found that many others have gone this route as well.
This involves creating a new blank conda environment for each project and then using pip install -r requirements.txt into the conda environment.
Cheat sheet#
A short tutorial can be found here: https://edcarp.github.io/introduction-to-conda-for-data-scientists/02-working-with-environments/index.html
The official
condadocumentation can be found here: https://conda.io/projects/conda/en/latest/user-guide/tasks/manage-environments.html#activating-an-environment
Working with pip requirements
conda allows for a lot of flexibility, but can often be slow. pip, however, is fast for what it does. You can install the requirements for this project using the requirements.txt file specified here. Do this with the following command:
pip install -r requirements.txt
Working with conda environments
The dependencies used in this environment (along with many other environments commonly used in data science) are stored in the conda environment called blank which is saved in the file called environment.yml. To create the environment from the file (as a prerequisite to loading the environment), use the following command:
conda env create -f environment.yml
Now, to load the environment, use
conda activate blank
Note that an environment file can be created with the following command:
conda env export > environment.yml
However, it’s often preferable to create an environment file manually, as was done with the file in this project.
Also, these dependencies are also saved in requirements.txt for those that would rather use pip. Also, GitHub actions work better with pip, so it’s nice to also have the dependencies listed here. This file is created with the following command:
pip freeze > requirements.txt
Other helpful conda commands
Create conda environment from file:
mamba env create -f environment.ymlActivate environment for this project:
mamba activate blankRemove conda environment:
mamba remove --name finm --allCreate blank conda environment:
mamba create --name myenv --no-default-packagesCreate blank conda environment with different version of Python:
mamba create --name myenv --no-default-packages pythonNote that the addition of “python” will install the most up-to-date version of Python. Without this, it may use the system version of Python, which will likely have some packages installed already.