Remote Machines and High-Performance Computing#
Why Remote Machines?#
In quantitative finance, you will frequently need to work on machines other than your laptop. Common reasons include:
Large datasets: The TRACE corporate bond dataset exceeds 100 GB. Your laptop may not have enough disk space, let alone RAM, to process it.
Long-running computations: Cleaning 20+ years of TRACE data takes 7–10 hours. You don’t want to tie up your laptop for that long (or worry about it going to sleep mid-computation).
Shared project storage: A research team needs a central location where everyone can access the same data and code.
Specialized hardware: Some computations benefit from high-memory nodes (512 GB+ RAM) or GPUs that aren’t available on personal machines.
The solution is to run your code on a remote machine—a server or compute cluster that you connect to over the network.
SSH: Secure Shell#
What is SSH?#
SSH (Secure Shell) is the standard protocol for securely connecting to remote machines over the network. It provides:
Encrypted communication: All data between your laptop and the remote machine is encrypted.
Authentication: You prove your identity with a password, SSH key, or multi-factor authentication (MFA).
Remote terminal: Once connected, you get a command-line shell on the remote machine, just as if you were sitting in front of it.
Connecting to Midway3#
To connect to UChicago’s Midway3 cluster:
ssh <your-cnetid>@midway3.rcc.uchicago.edu
You will be prompted for your password, followed by Duo multi-factor authentication (MFA). After completing MFA, you land on one of the cluster’s login nodes.
Login nodes are shared
Login nodes are shared by all users. They are intended for lightweight tasks: editing files, submitting jobs, transferring data. Do not run computationally intensive work on login nodes. Use the job scheduler (SLURM) to request dedicated compute resources instead.
SSH Config File#
If you connect frequently, you can simplify the command by adding an entry to
your ~/.ssh/config file:
Host midway3
    HostName midway3.rcc.uchicago.edu
    User <your-cnetid>
After this, you can connect with just:
ssh midway3
UChicago’s Midway3 Cluster#
What is an HPC Cluster?#
A high-performance computing (HPC) cluster is a collection of interconnected computers (called nodes) that work together to provide large-scale computational resources. Unlike your laptop, which has a single processor and limited memory, a cluster can have thousands of processors and terabytes of RAM distributed across hundreds of nodes.
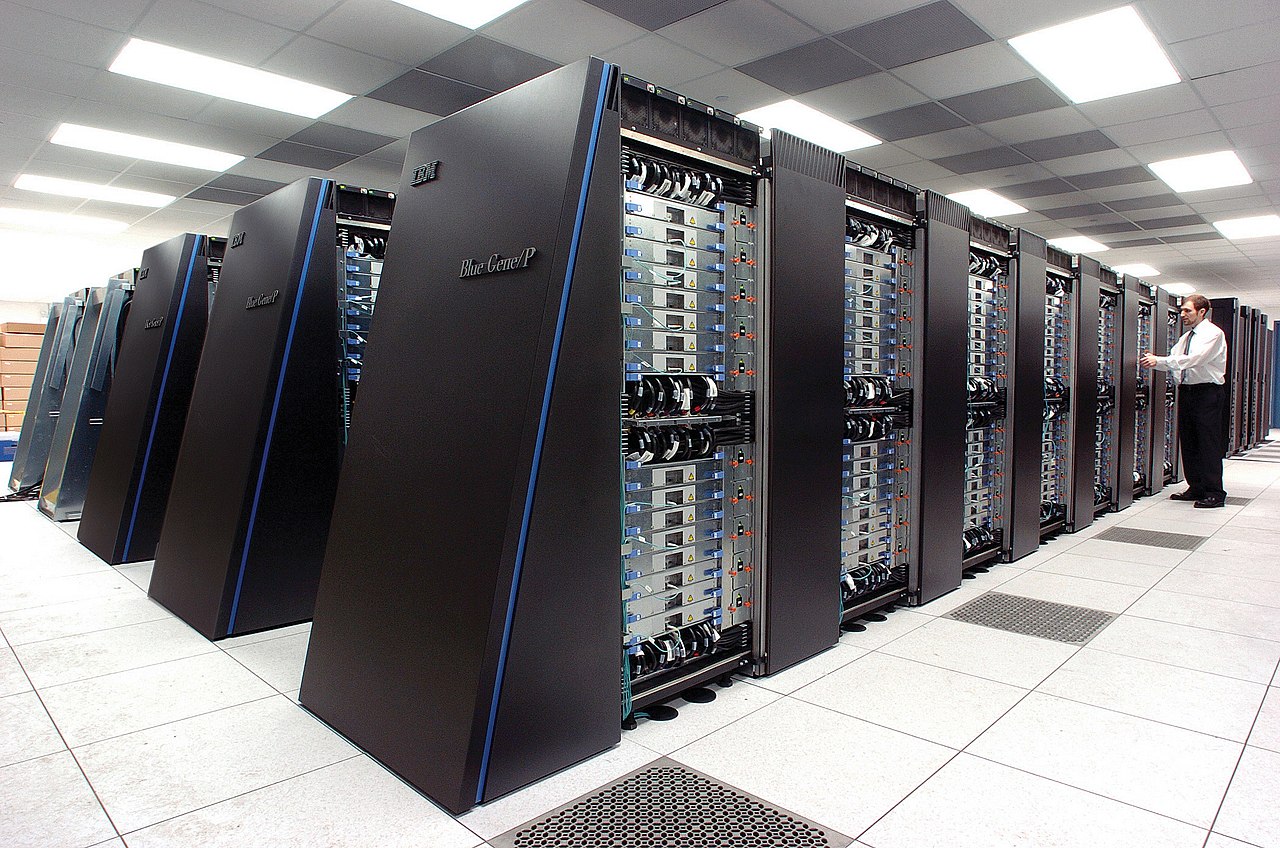
Fig. 7 An HPC cluster: rows of interconnected compute nodes in a data center. Image: Argonne National Laboratory / Wikimedia Commons#
Midway3 Architecture#
UChicago’s Research Computing Center (RCC) operates the Midway3 cluster, which has 220+ nodes with over 10,000 CPU cores. The cluster consists of:
Login nodes: Where you land after SSH. Used for file editing, job submission, and data transfer. These have internet access.
Compute nodes: Where your jobs actually run. These are allocated by the SLURM job scheduler. Most compute partitions have no internet access.
Storage systems: Shared filesystems accessible from all nodes.
Storage Hierarchy#
Location |
Path |
Quota |
Backed Up |
Purpose |
|---|---|---|---|---|
Home |
|
30 GB |
Yes |
Config files, small scripts |
Project |
|
Large (shared) |
Yes |
Shared course data and code |
Scratch |
|
Large |
No |
Temporary large files, intermediate results |
Tip
Store your code and data in /project/ or /scratch/, not /home/.
Store conda/virtual environments in your home directory ($HOME/envs/)—they
create many small files that can exhaust the shared project directory’s file
count limit.
Module System#
Midway uses a module system to manage software versions. Instead of installing software yourself, you load pre-installed modules:
# See available Python versions
module avail python

# Load a specific Python version
module load python/3.11.9

# See currently loaded modules
module list

# Unload a module
module unload python/3.11.9
SLURM: The Job Scheduler#
Why a Job Scheduler?#
A cluster is shared by hundreds of users. Without coordination, everyone would try to run their jobs on the same nodes, leading to resource contention and poor performance. SLURM (Simple Linux Utility for Resource Management) is the job scheduler that manages this:
You request resources (CPUs, memory, time).
SLURM queues your request and waits for resources to become available.
When resources are free, SLURM allocates a compute node and runs your job.
When your job finishes (or exceeds its time limit), SLURM releases the resources for other users.
Partitions#
Compute nodes are organized into partitions (groups of nodes with similar hardware). Key partitions on Midway3:
Partition |
Nodes |
Cores/Node |
RAM/Node |
Max Time |
Internet? |
|---|---|---|---|---|---|
|
184 |
48 |
192 GB |
36 hours |
No |
|
2 |
48 |
768–1536 GB |
36 hours |
No |
|
11 |
varies |
192–384 GB |
36 hours |
No |
|
shared |
varies |
varies |
6 hours |
Yes |
```{admonition} The build partition
- class:
note
The build partition is special: it is the only partition with outbound
internet access. Use it when you need to download data, install packages
from PyPI, or pull from Git repositories. Its 6-hour wall time limit makes it
unsuitable for long-running computations, but it is ideal for setup tasks and
data pulls.
### Interactive Sessions with `sinteractive`

For exploratory work, use `sinteractive` to get a shell on a compute node:

```bash
# Basic interactive session (2 hours, default partition)
sinteractive --account=finm32900

# Request more resources
sinteractive --account=finm32900 --partition=caslake \
    --time=04:00:00 --cpus-per-task=4 --mem=32G

# Quick debugging (free, 15 minutes, up to 4 cores)
sinteractive --account=finm32900 --qos=debug --time=00:15:00
After running sinteractive, you wait in the queue until a node is available.
Once allocated, your terminal prompt changes to show the compute node name
(e.g., midway3-0042), and you can run commands directly on that node.
Batch Jobs with sbatch#
For long-running or unattended work, write an sbatch script and submit it. Here is a real example from our TRACE data pipeline:
#!/bin/bash
#SBATCH --job-name=trace-data-pipeline-stage0
#SBATCH --output=%j_trace-data-pipeline-stage0.out
#SBATCH --error=%j_trace-data-pipeline-stage0.err
#SBATCH --nodes=1
#SBATCH --ntasks-per-node=1
#SBATCH --cpus-per-task=5
#SBATCH --mem-per-cpu=8000
#SBATCH --partition=build
#SBATCH --time=6:00:00
#SBATCH --account=finm32900

# Change to the project directory
cd /home/${USER}/trace-data-pipeline
echo "Changed to trace-data-pipeline directory"

# Activate Python virtual environment
source /project/finm32900/tdp-venv-p3119/bin/activate
echo "Activated virtual environment"

# Run the pipeline
echo "Executing stage 0 pipeline"
./run_pipeline_stage0.sh
Key #SBATCH directives:
Directive |
Meaning |
|---|---|
|
Human-readable name for your job |
|
Files for stdout and stderr ( |
|
Number of compute nodes |
|
CPU cores per task |
|
Memory per CPU core (in MB) |
|
Which partition to use |
|
Maximum wall time (HH:MM:SS) |
|
Billing account |
Submit and manage jobs:
# Submit a batch job
sbatch my_script.sbatch

# Check your jobs in the queue
squeue --user=$USER

# Cancel a job
scancel <job_id>
Discussion
Notice that the sbatch script above uses --partition=build. Why? Because the
TRACE pipeline’s stage 0 includes data pulls from WRDS, which requires internet
access. What would you change if the job only needed to process data already
on disk?
The Internet Access Problem#
This is one of the most important architectural considerations when working on an HPC cluster: most compute nodes have no internet access.
On Midway3, only the build partition and login nodes can reach the outside
internet. This means your code cannot download data, install packages, or
access APIs while running on a standard compute partition like caslake.
Decoupling Data Pulls from Processing#
The TRACE case study addresses this with a clean architectural separation:
┌─────────────────────────────────────────────────┐
│  Phase 1: Data Pulls (requires internet)        │
│  ─────────────────────────────────────────────── │
│  • pull_trace_enhanced.py  → WRDS               │
│  • pull_fisd.py            → WRDS               │
│  • pull_liu_wu_yields.py   → Google Sheets       │
│  • pull_open_source_bond.py → openbondassetpricing│
│                                                  │
│  Run on: login node or build partition           │
│  Output: _data/pulled/**/*.parquet               │
└──────────────────────┬──────────────────────────┘
                       │
                       ▼
┌─────────────────────────────────────────────────┐
│  Phase 2: Processing (no internet needed)       │
│  ─────────────────────────────────────────────── │
│  • build_fisd_universe.py                        │
│  • filter_trace_fisd.py                          │
│  • stage0/clean_trace_local.py                   │
│  • stage1/create_daily_stage1.py                 │
│                                                  │
│  Run on: any partition (caslake, bigmem, etc.)   │
│  Input: _data/pulled/**/*.parquet (local disk)   │
│  Output: _data/stage0/, _data/stage1/            │
└─────────────────────────────────────────────────┘
The pull scripts download everything once and write to Hive-partitioned Parquet
files in _data/pulled/. The processing scripts then read exclusively from
local disk—no network calls, no WRDS connection, no API requests.
This separation has several benefits:
Flexibility: Processing jobs can run on any partition, not just
build.Reliability: No risk of a network timeout crashing your 6-hour job at hour 5.
Reproducibility: The pulled data is a snapshot. Rerunning processing on the same snapshot produces identical results.
Incremental updates: Pull scripts check which partitions already exist on disk and only download new months.
Tip
This “pull once, process anywhere” pattern is a good practice for any data pipeline that runs on machines with restricted internet access. It also makes your pipeline easier to debug, since you can inspect the raw pulled data independently of the processing logic.
File Transfer: rsync and scp#
You will frequently need to move files between your laptop and the cluster.
scp: Simple Copies#
scp (secure copy) works like cp, but over SSH:
# Copy a file TO Midway
scp my_script.py <cnetid>@midway3.rcc.uchicago.edu:/home/<cnetid>/

# Copy a file FROM Midway
scp <cnetid>@midway3.rcc.uchicago.edu:/scratch/midway3/<cnetid>/results.parquet ./

# Copy an entire directory
scp -r my_project/ <cnetid>@midway3.rcc.uchicago.edu:/project/finm32900/<cnetid>/
rsync: Smart Synchronization#
rsync is more powerful than scp. It only transfers files that have changed,
making it much faster for repeated syncs:
# Sync a local project directory to Midway
rsync -avzhe ssh ./my_project/ \
    <cnetid>@midway3.rcc.uchicago.edu:/project/finm32900/<cnetid>/my_project/

# Sync results from Midway back to your laptop
rsync -avzhe ssh \
    <cnetid>@midway3.rcc.uchicago.edu:/scratch/midway3/<cnetid>/results/ \
    ./results/
Key rsync flags:
Flag |
Meaning |
|---|---|
|
Archive mode (preserves permissions, timestamps, symlinks) |
|
Verbose (show files being transferred) |
|
Compress data during transfer |
|
Human-readable file sizes |
|
Use SSH as the transport |
rsync vs. scp
Use scp for quick one-off file transfers.
Use rsync when you’re synchronizing directories repeatedly (e.g., pushing
code updates to the cluster, pulling results back). rsync will only transfer
the files that have changed, saving significant time on large directories.
Globus: Large-Scale Transfers#
For very large transfers (tens of gigabytes or more), UChicago’s RCC recommends Globus, a managed file transfer service optimized for research data. It handles retries, parallelism, and integrity checking automatically. See the RCC documentation on data transfer for details.
SSH Port Forwarding#
The Problem#
You’ve started a Jupyter notebook server on a Midway compute node. But that compute node is deep inside the cluster network—your laptop can’t reach it directly. How do you open the notebook in your browser?
The Solution: SSH Tunneling#
SSH port forwarding (also called SSH tunneling) creates a secure tunnel from a port on your laptop to a port on the remote compute node, routed through the Midway login node.
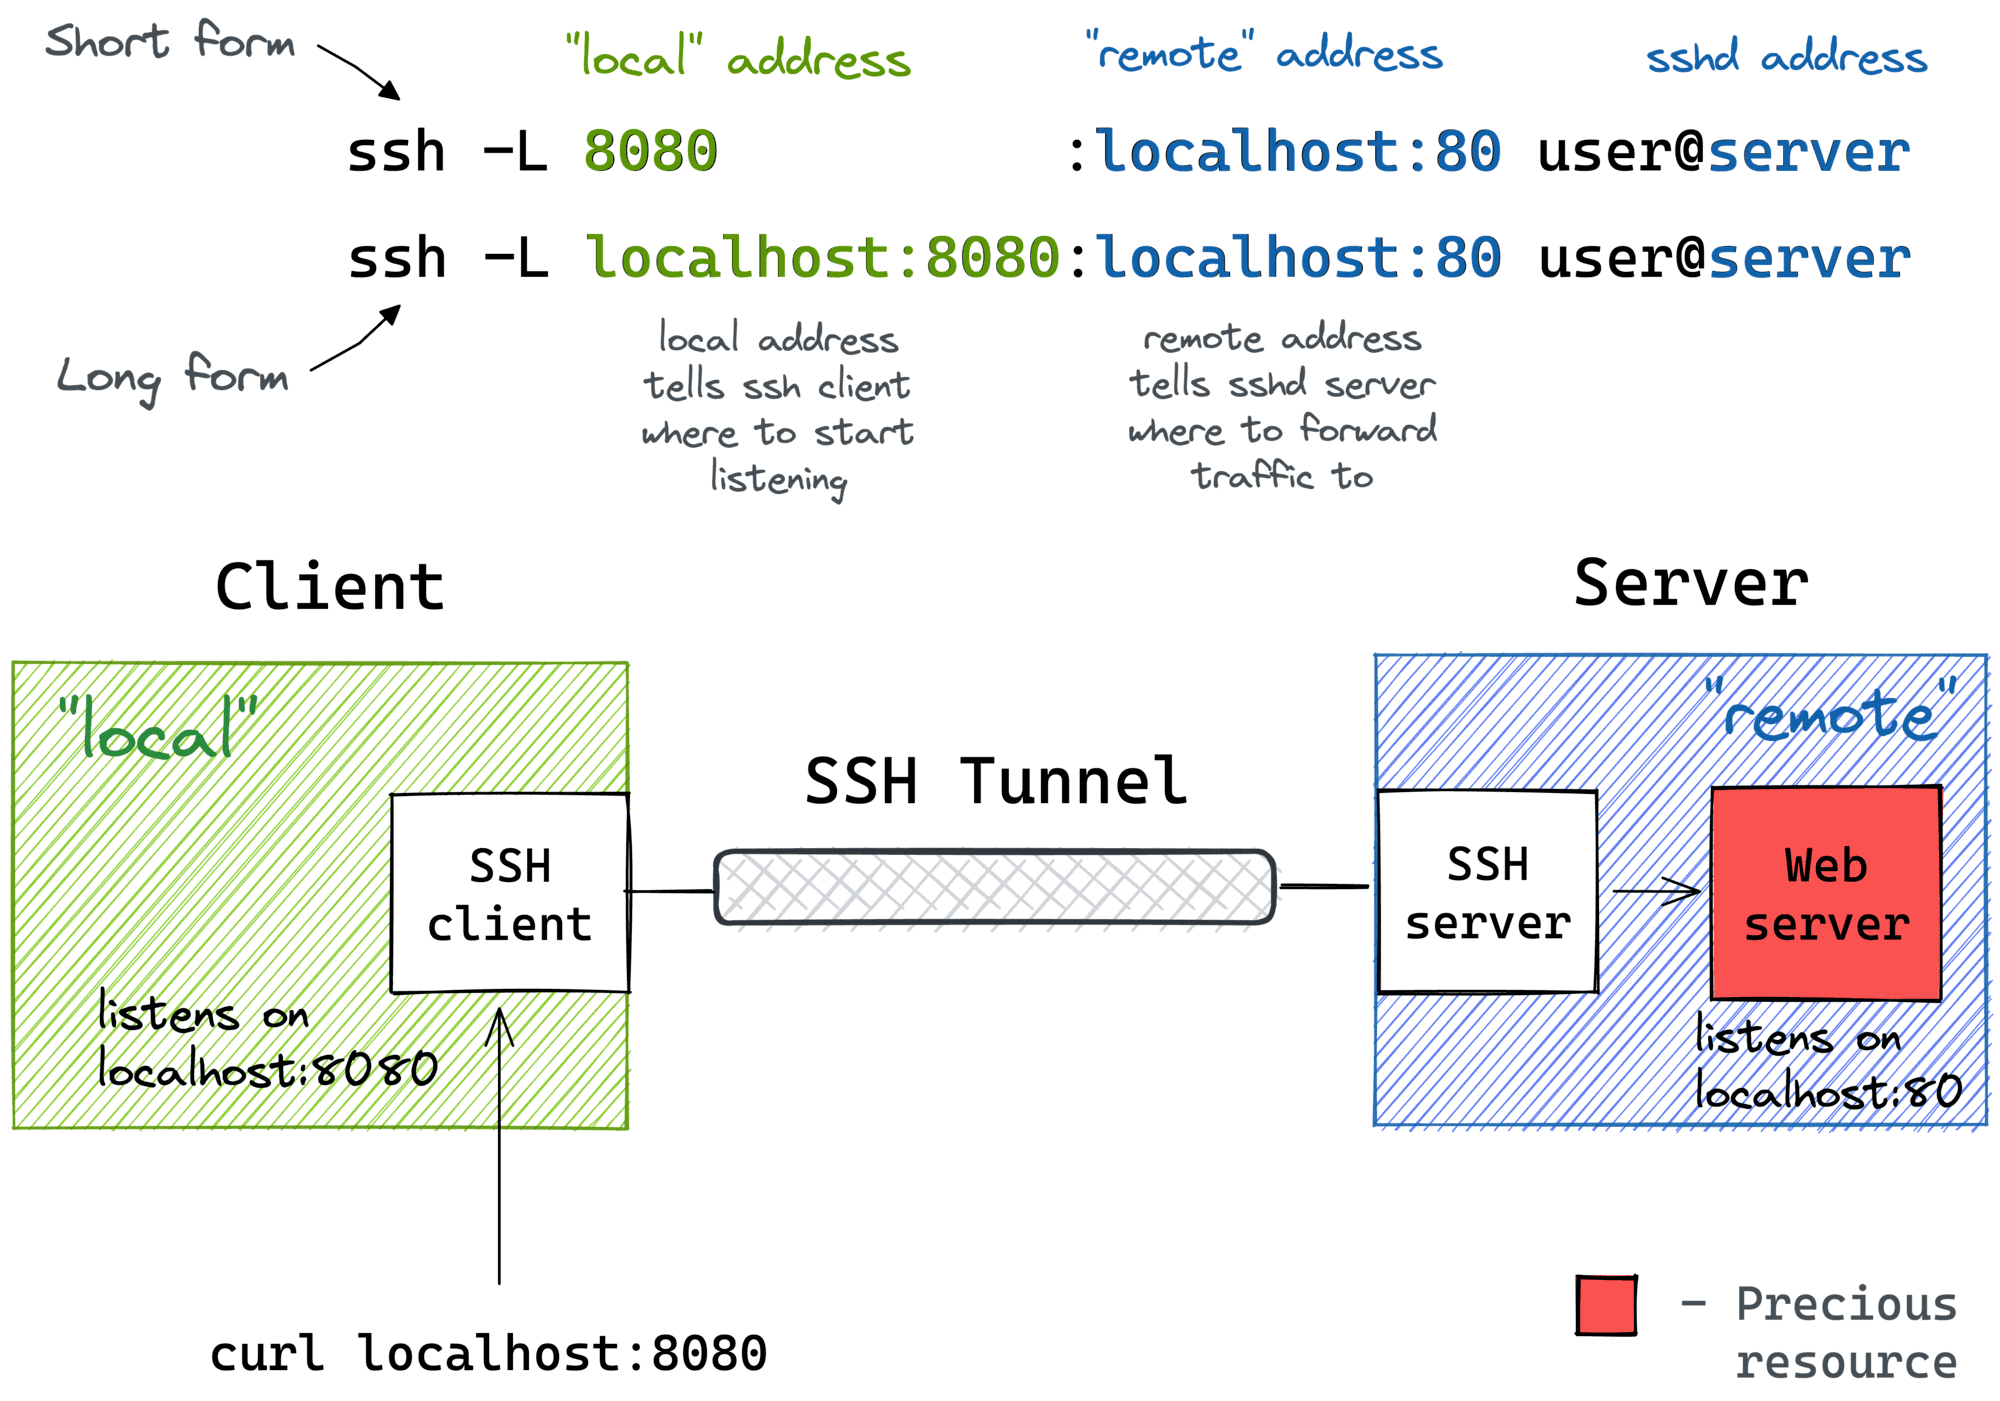
Fig. 8 Local port forwarding: your laptop connects to localhost:PORT, and SSH forwards the traffic through the login node to the compute node where Jupyter is running.#
Image: iximiuz.com
The command looks like this:
ssh -N -f -L <local_port>:<compute_node_ip>:<remote_port> \
    <cnetid>@midway3.rcc.uchicago.edu
Flag |
Meaning |
|---|---|
|
Don’t execute a remote command (just forward ports) |
|
Run in the background |
|
Local port forwarding: |
After running this, opening http://127.0.0.1:<local_port> in your browser
will connect to the Jupyter server on the compute node, tunneled securely
through Midway’s login node.
Note
We walk through this entire process step-by-step in the in-class exercise.
Further Reading#
RCC User Guide: SSH — Connecting to Midway, file transfers
RCC User Guide: SLURM — Job submission, partitions, resource requests
RCC User Guide: sinteractive — Interactive sessions
RCC User Guide: Python & Jupyter — Setting up Python and Jupyter on Midway
RCC User Guide: Partitions — Available partitions and their specifications
TRACE Case Study Repository — The TRACE data pipeline used in this course